improving D&D monster encounter tables
2016.01.21 (updated : 2016.01.20)
I've devised a random monster encounter table that utilizes the distributions I've built on this page. Click the 'graph' button about 1/3 of the way down the page (or see the bottom of this page).
My list puts all the big bads at the beginning of the range, and puts all of the aberrations, slimes*, etc at the bottom. Rolling a d16 + d10 (black line) gives a nice flat curve across the middle, but tapers off perfectly for the top-most and bottom-most parts of the range. So, the big bads and horrors are less likely to come up.
But in some conditions, you *want* those big bads and horrors. It can be done using the same table. I roll 3d6 and add up the lowest two if I'm interested in trolls & hill giants (blue line). If I'm interested in aberrations, I roll 3d6 and add up the highest three, then add 14 (orange line).
Finally, there's my (almost eight-year-old) son and his low-level character. Still using the same chart but a different selection: 2d6 + 7 (green line). This cuts out the things that will kill them outright, and keeps the neutral encounters, the pranksters, easier confrontations, etc. I decided to make my own monster encounter tables because the second thing my son ever ran into – on the first day of gaming, at age six – was an eight-sided hydra. As he likes to say, "no fair".
*I replaced the traditional slimes with a type of demon that's essentially the "grey goo" of nanotech fears.
| big bads | cute and cuddlies | aberrations |
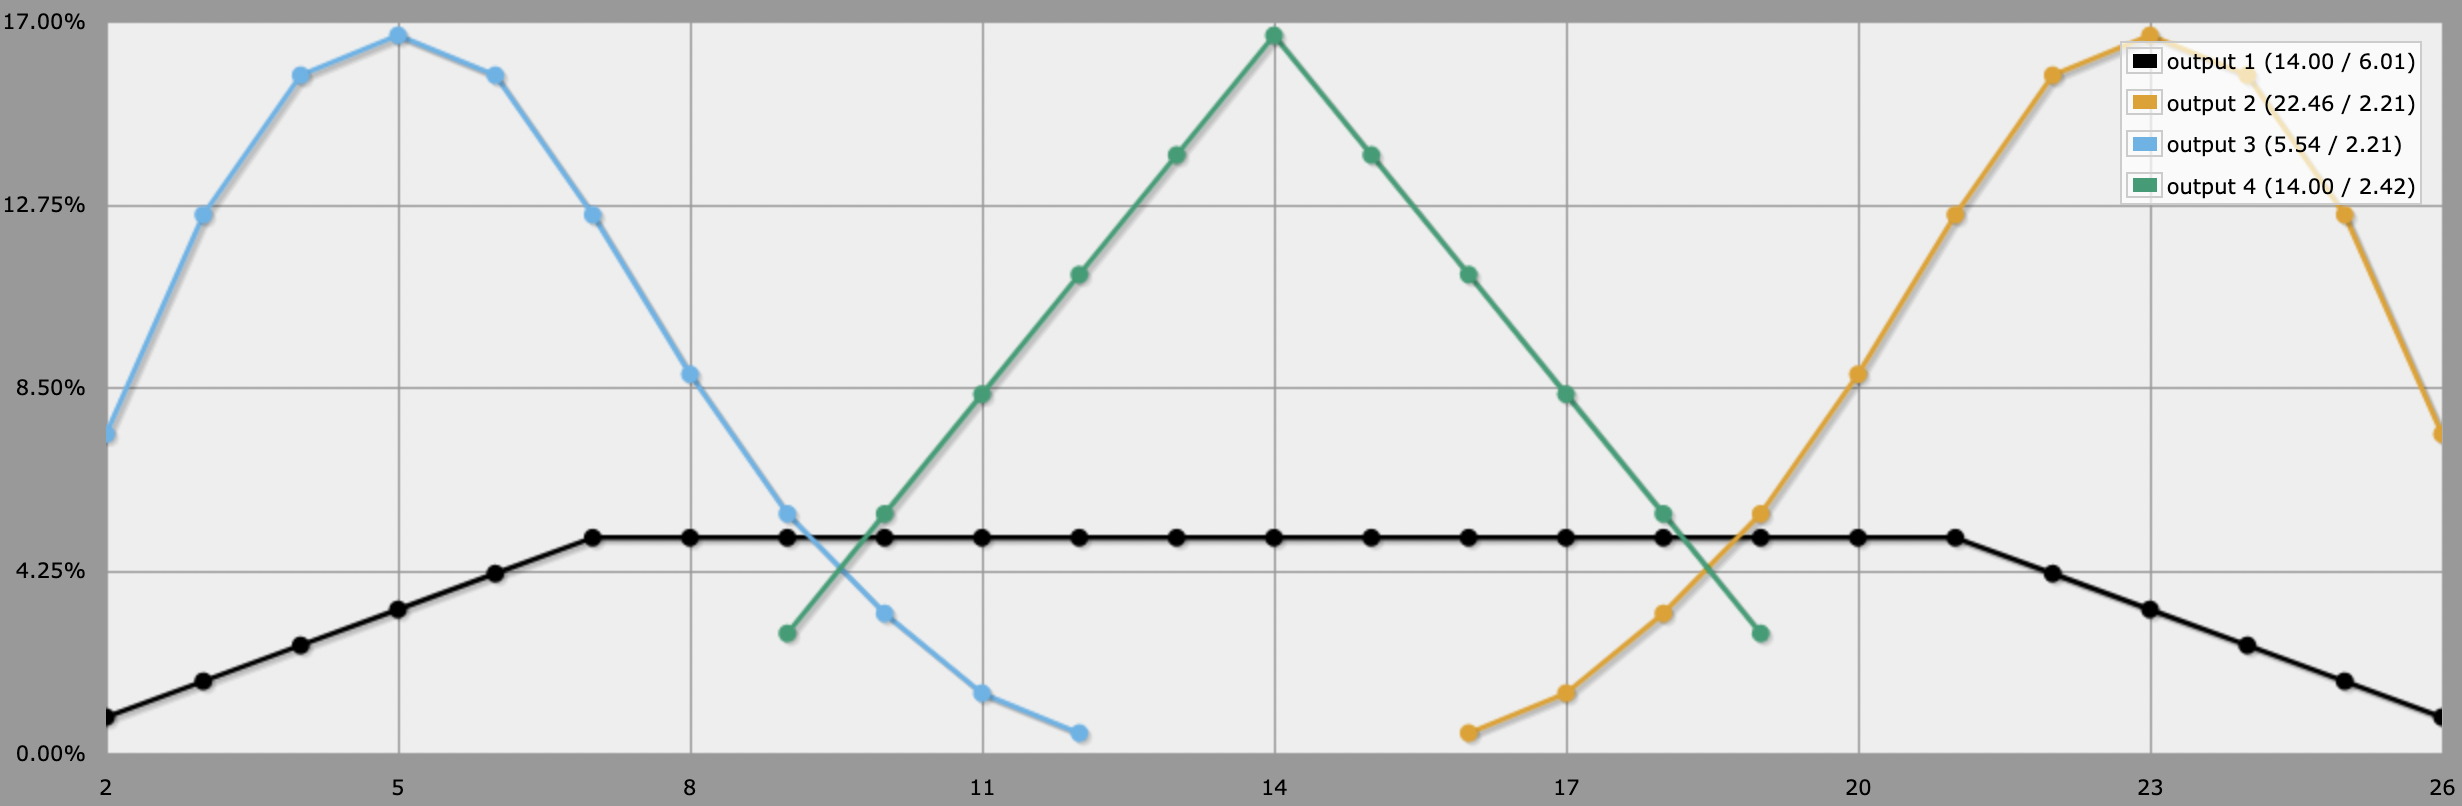
output 1 d16 + d10
output 2 14+ [highest 2 of 3d6]
output 3 [lowest 2 of 3d6]
output 4 7 + 2d6