a custom wooden toy
2012.05.11 (updated : 2016.03.07)
I made a custom toy train for my son; sort of.
My son had three "Thomas" trains that were identical. Two had a nasty face on them ("Misty Island" Thomas), and really he didn't need three.
So I decided to make a special train for him as follows:
- I cut off the water tanks at the side of the body, adding some details instead.
- Then I cut off the front of the running board and added some primitive "pistons".
- I cut through the base of the train to liberate the front axel, then pared down the front wheels to make them free-running, non-powered wheels. Into the axel hole I fitted a small wooden spacer, then glued on a modified "2x2 flat" piece of LEGO to hold the front axel in place.
- I then pared off the nasty plastic face, and painted the surface black with some nasty-smelling black paint that would take to the plastic. I'd tell you what the paint is, but I was sold the stuff in Japan and neither my wife and I can parse the jargon on the label.
- Lastly, I ordered a $2 spare "Edward" tender from Singapore on Ebay, and sanded-down and repainted the whole thing.
My son loves it, and plays with it all the time. The grey paint is some sort of water-soluble stuff so I've been thinking about adding a layer of glossy stain but I'm not sure that it would work out.
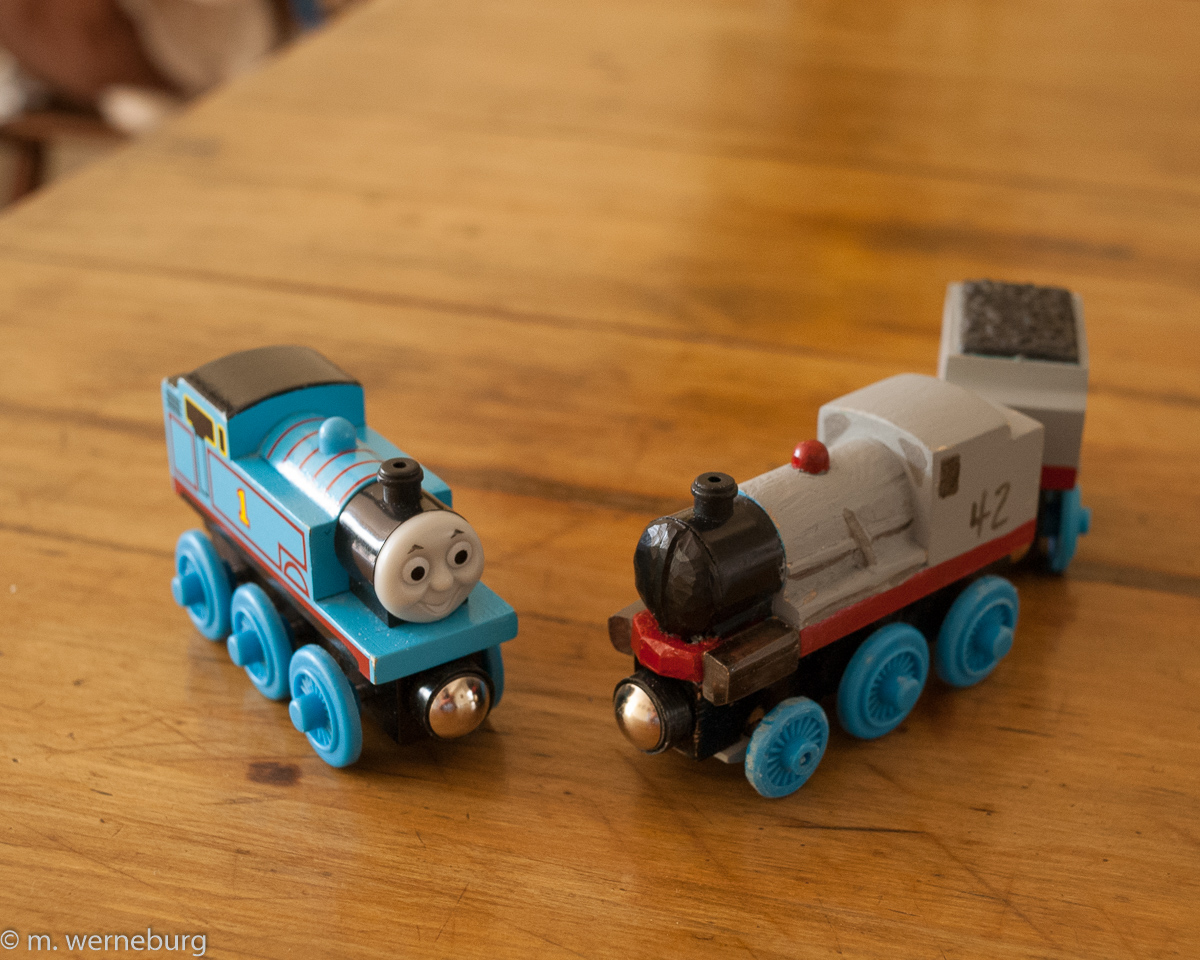
Front view - a custom train for the Thomas series
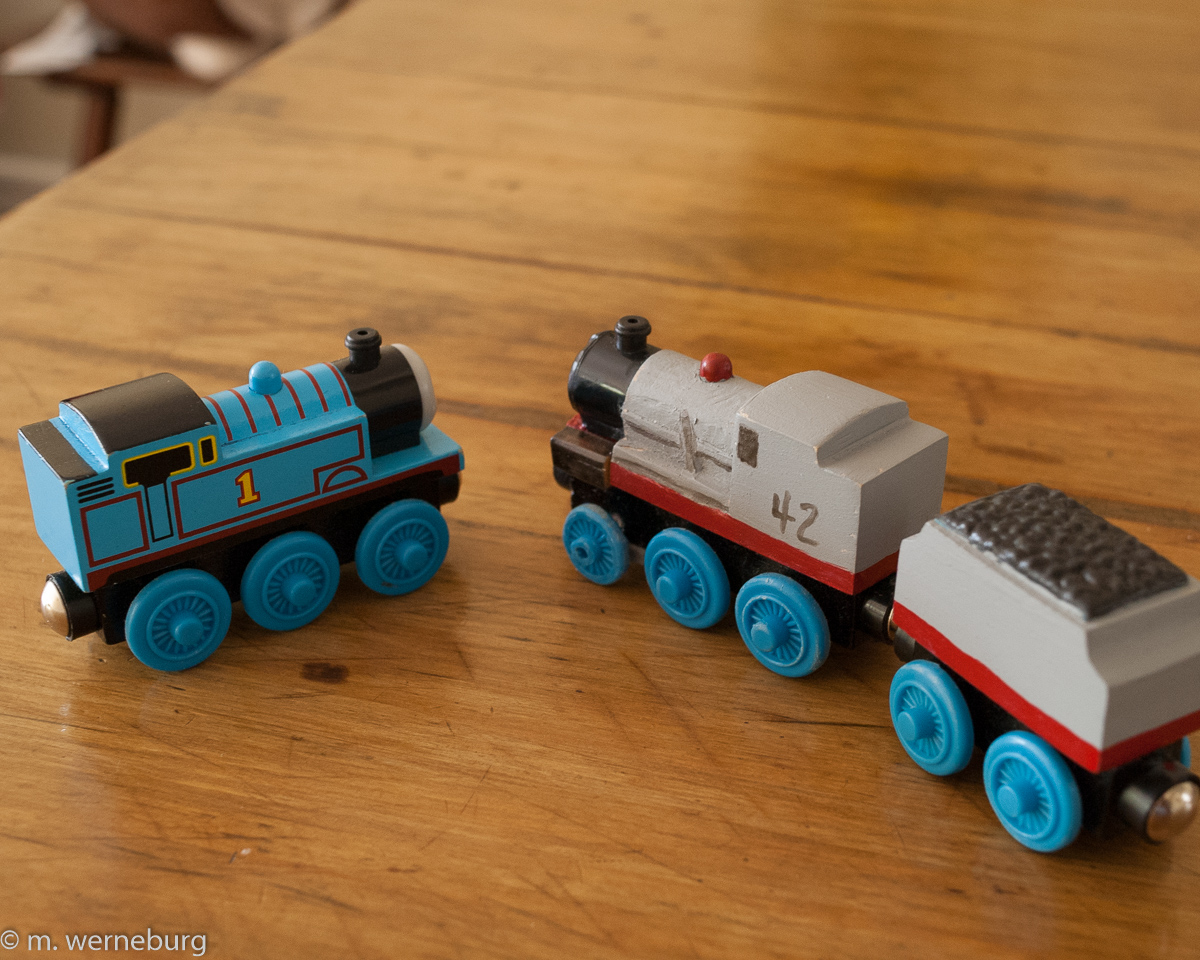
Rear view - a custom train for the Thomas series
I'd tried all this once before, sanding down a spare "Percy" figure and repainting it. I'd thought that a glossy paint would be the way to go, but found it hard to manage.
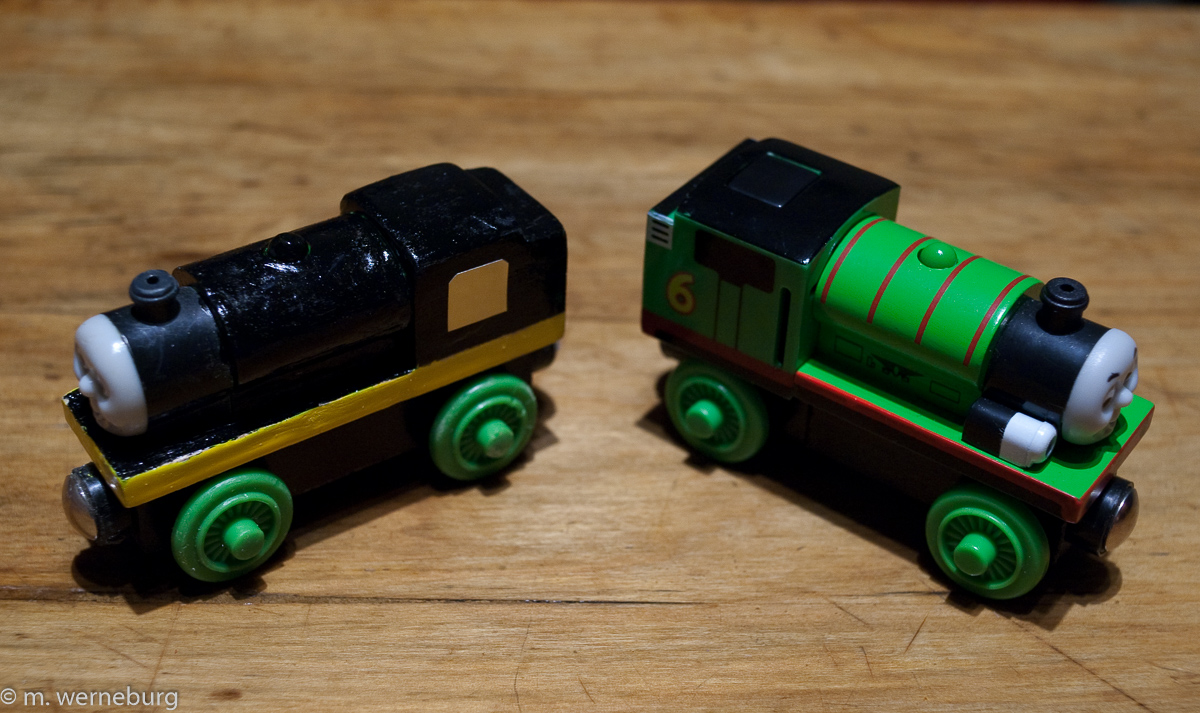
my first train modification
reader comments
Sorry to respond without certain anything to tell you, but I just don't know for sure. I would attend in person if I were you. I don't recall signing any forms in person either on drop-off or on pick-up, but I think they checked my photo against my face. Good question, JJ.
Also to be noted is that the Chinese embassy visa section is only open 9am to 12 noon. Can anyone confirm if you can get a tourist visa to China while residing in Japan on a tourist visa as a gaijin. Thanks.
I don't see why you shouldn't be able to do that, Mazhanshi. Why not contact the embassy?
Michael Great info - just what I needed but am slightly concerned you said pickup date was in two weeks! I thought I read it takes 4 working days. or 2 if you pay the extra 3000 yen Also probably going to stay with friends so can I give that address in stead of hotel or is it easiest just to book a cheap hostel online then cancel the booking? Thanks for any help J
It's probably high time I took that information down, J. It's been ~3 years, and it's entirely likely that things have changed or that circumstances vary quite a bit. For me I recall the pick up turnaround being two weeks, but it's entirely possible that there are short-cuts. Regarding the address where you'll be staying: find out whether your friends mind that you'll be putting their address on the thing before you do so: maybe leaving their address out of it would be an advantage to them somehow.
AN UPDATE I have just been through the process (am a foreigner living in Tokyo) and it was interesting! I prepared everything,form, hotel and flight booking ,photos and arrive early at the embassy. A security guard came out and explained where to go and the fact that bags would be searched and to make sure you had everything in ready. I was second in queue and at reception desk handed everything over only to be met by a torrent of Japanese ,only a few words I could understand - so switched to English and I was asked do I have Chinese family? NO, Ok so you cant have visa from here - a piece of paper with several addresses and phone numbers was thrust at me saying "you must call this agency in Ginza to get you visa" . I went down in the lift debating if I had time to call this place and get there , and as I got out the same security guard was waiting with a huge grin on his face and said " Oh poor foreigner , you couldnt get a visa eh - no problem , and led me outside and pointed to a small office nextdoor and said visa there OK" I entered and filled a different form and asked for a multiple 6month visa but was told I probably wouldnt get it cos I am a foreigner and have visited before (about 15years ago) Anyway I agreed to the two entry deal and was asked to pay 12,000 yen (quite a bit more than was stated on website) Four days later I picked up my passport and all seems to be Ok but it all seemed a strange process!
Strange? I'll say! Sounds like a bit of a shake-down. Mind you, I've been shaken down by officialdom in China itself, so I suppose anything's possible (e.g. see here: http://emuu.net/journal/2009.10.27/canal-town).
Thanks for writing!
Michael, I'm foreigner living in Japan for 14 years.I booked the Flight,Hotel,my passport is ok and I have my alien card,with all the details you mentioned.At the embassy today,I was told that there is no more individual visitor visa.Instead,I was sent to travel agency for tour visa and there,I was asked letter from my bank,letter from my company,an invitation letter from a friend living in Beijing.Without those documents,I will not travel to Beijing.What must I do with my trip fixed from March,2?
That's news to me! If I were you, I would find a reliable travel agency in Tokyo and see if you can have that information confirmed. Depending on your nationality (you didn't say in the note you left) it seems that it's now possible to obtain a visa upon arrival in Beijing, but it's only a limited set of countries so I don't know if that helps. (See more information here: http://news.xinhuanet.com/english/china/2013-01/01/c_132075763.htm)
All the best, Biduaya!
Thanks for the info but alas most of your page is now out of date as you can no longer get a tourist visa directly from the embassy. The place next door to the embassy has the cheapest commission rates I found, much less than if you use travel agents like HIS. So my advice is to not bother going into the embassy at all, and just go straight to the place next door. I was in and out in 5 minutes and had my visa 3 days later.
Good point. I'm retiring it. Today.
Very interesting thread. My situation is I am in the middle of an internship in Shanghai and will go for holidays to Tokyo for a week in August. I have only one entry on my 180 days duration visa which means I can t go back with this visa if I leave chinese territory. My plan is to apply for a 30 days visa (duration long enough to complete my internship) in one of the agency you mentionned. Yet, i m a bit worried they would be reluctant to process it as I will just be coming out of China. Do you have any idea if they would actually bother ? Also, if you have the contact details of one of this agency. Please don't hesitate to share it. Many thanks in advance!
Sorry, Pierre, I really have no idea and no solid leads for you. It's been quite a while since I went through it all, and given how quickly things change my notes might be completely out of date.
Hi, I was looking for info about chinese visas and I found your website. Same situation, I need to go to Roppongi this week. And thats actually my question: do you know whether I need to go in person or can I send my wife there? Thanks mate, jj